6 Essential WordPress Plugins For Your Site’s Monetization

2018.09.28

 (9 votes, average: 4.89 out of 5)
Previously we’ve discussed the main tactics used by bloggers to monetize their sites, and today’s compilation is divided into three groups of the most popular monetization methods.
We decided to facilitate your blogging job, which is especially crucial if you’re blogging professionally. So below we’ve got WordPress plugins indispensable for blog owners who make money with their hobby.
Products’ sale
When you sell products online, it doesn’t matter whether they are physical or digital, – you should ensure the best experience for your customers. The next important thing is to set the sales the way they will require minimum energy, time, and effort from you.
WooCommerce
More than 3 million websites trust WooCommerce with their online stores. And there’s a good reason for that.
This plugin not only helps set up your WP site for selling various products, both physical and digital, handling their configuration. It also allows you to organize shipping of your products, supports main payment methods (giving your customers more freedom and flexibility), offers very elaborative reporting, and basically very customizable and handy.
With more than 1,000 available extensions you can set WooCommerce to make it your one and only e-commerce tool.
Setup and functions
As soon as you install the plugin, you can start setting your online store. The five steps that walk you through this process will take the main workload off you, and give you a fresh start with your store.
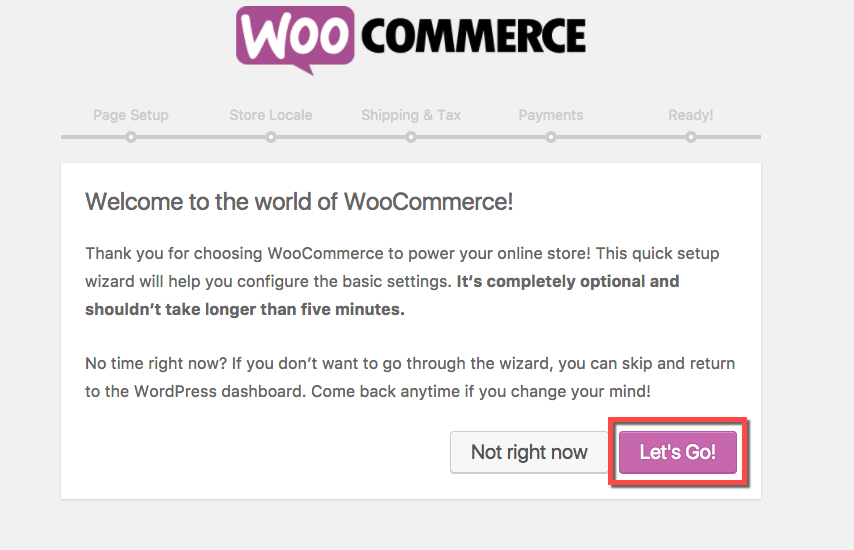
As you see, the setup at the start is optional, but actually, these steps are all it takes to get your site fly.
- Page setup will (obviously) help you get the main pages for your online store. The plugin will create new ones unless you’ve already had pages for Shop, Cart, Checkout, and My Account.
- Then you’ll be able to set your Shop Locale by specifying your country, currency, and some basic units.
- In Shipping and Taxes, you can choose to include/exclude the taxes for your products’ pricing, and calculate the estimated shipping costs. If you have difficulties with any of these, WooCommerce will offer suggestions based on your location.
- Like we said before, the plugin allows you to accept different payment methods, online as well as offline. However, at this setup page, your choice will be limited to PayPal, Cheque Payments, Cash on Delivery, and Bank Transfer. You’ll be able to add more methods later on, by installing a few add-ons.
- Aaand, here you go! The last step provides you with some useful information, but in general, you’re all set. You can now start working on adding a product to your store and managing your data.
Easy Digital Downloads
While WooCommerce is the plugin that works with all types of products, Easy Digital Downloads is made to facilitate your sale and distribution of purely digital goods, from software to music. So if your products fall into this category, you don’t even need to go a long way, and set WooCommerce.
Easy Digital Downloads is in fact very easy to deal with, for you in terms of configuration and setting and for your customers in terms of use. Just like WooCommerce, this plugin supports numerous add-ons that expand its functionality.
Setup and functions
Right after you download and install the plugin, it’s ready for the job. All further customization will help you configure the plugin for your needs and help you get started with selling your goods. There are six main tabs that you can use for changes and personalization.
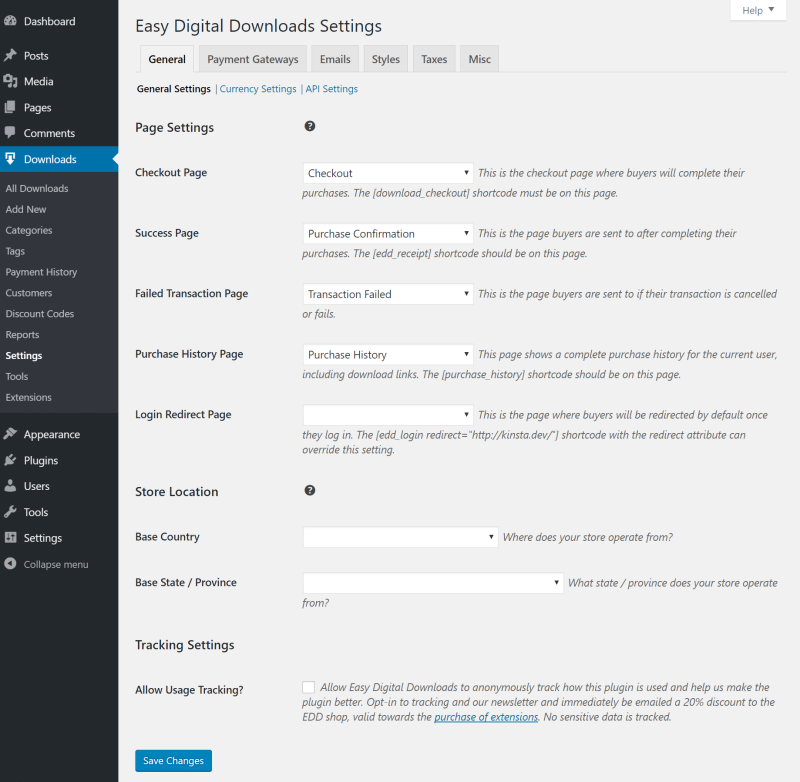
- Similar to WooCommerce the first tab is for General settings, where you can create new pages or set properties for the existing ones, provide information about your location and currency you’re going to use.
- At Payment Gateways you choose the payment methods you’ll accept and set the default one.
- Emails are a very useful and handy feature for site owners selling stuff. You can create and upload an email template that your customers will receive after having made a purchase.
- The Styles tab is very straightforward and helps you change the style of your online store, like the design of the buttons or pages.
- Again, like with WooCommerce, the Taxes tab ensures that your products display the correct prices according to the tax rates you’ve identified.
All you need to do after setting all these is to add your products and their description and wait for your first sale. Simple and yet concise reporting will keep you updated on the success you’re making, so you always know where your money comes from.
Ads Monetization
So you don’t have a product to sell, and you’re monetizing your blog through ads placement. For most website owners it’s the easiest way to arrange some stable passive income from their sites. And again, WordPress plugins will assist you in organizing this process, making it less time consuming, more energy efficient, and more profitable.
MageNet Website Monetization Plugin
87,000+ users are using MageNet to monetize their websites through content placement. For them, it’s an excellent opportunity to satisfy both the users of their sites and the advertisers. As MageNet deals only with contextual ads, the users don’t get distracted by the flickering of ads banners, and the advertisers spread the word about their products ads reach to the customers in targeted niches.
What really attract publishers to MageNet, even beginners, is the pay per placement scheme. Instead of leaving the users to worry about the number of impressions or clicks, MageNet makes payments per each ad placement.
However, placing ads may require extra efforts from website owners when it comes to getting the content from the advertisers and then finding pages and places to fit it on. The Monetization Plugin solves this issue by automating the ads’ placement.
Setup and functions
Everyone who uses MageNet to sell ads from their sites has free access to the Monetization Plugin. After users have added their website, they need to confirm their ownership, and one of the easiest ways is to install the plugin. The system will then automatically index the site and admits it to ads placement.
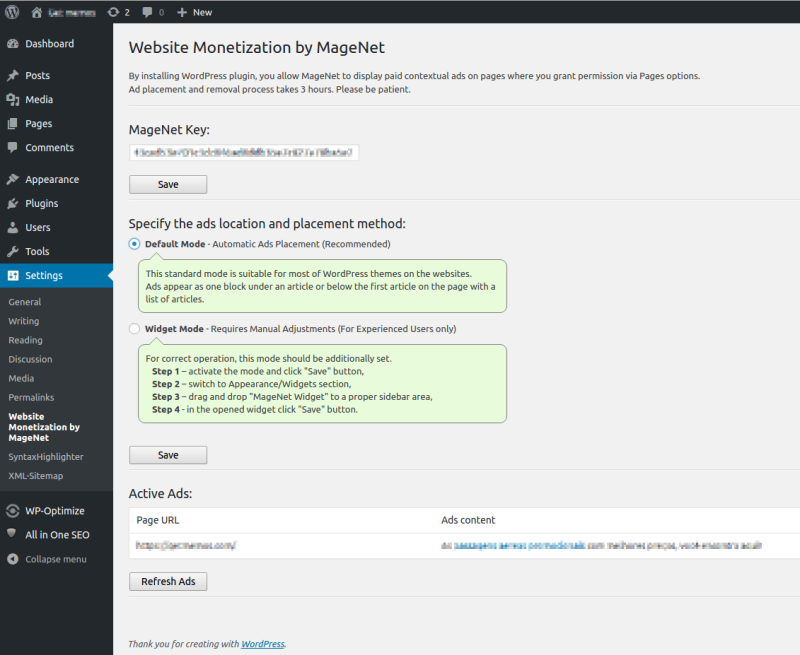
No extra steps are required — the plugin is on Default mode and allows automatic ads placement. After the first ad has been published, it appears both in the MageNet account of the user and the Website Monetization Plugin tab in WordPress account under Active Ads.
Ready to monetize with user-friendly contextual ads? Download the Website Monetization Plugin right now!
Download MageNet Website Monetization Plugin
AdRotate
If, however, you decide to monetize with banner ads, AdRotate banner is just the tool for you. This plugin allows you to adjust your banner ads and place them practically everywhere on your site. In addition to the ads from the most popular ad networks, you can use the banners you’ve created all by yourself.
The initial reason of banners on your site is, of course, monetization, so the plugin offers a range of tools to track the performance of the ads and to set ad groups for more useful analysis.
Setup and functions
After you’ve installed the plugin, you can start crafting your first ad with its help.
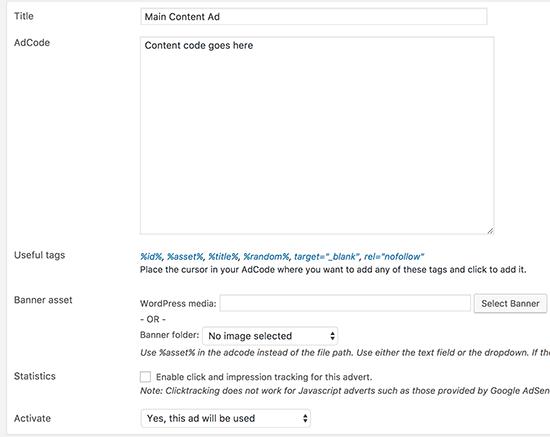
- Creating ads
Go to the plugin tab, and select Adverts. Later the list of the ads you create will appear here. If there’s nothing there yet, it’s time to create an ad by clicking Add New. On the following page provide the name for your ad, and paste the ad code from your advertising network. You can also generate such code for self-hosted ads, provide images, and add necessary tags for your adverts. Make sure to enable tracking to gather statistics, and activate the ad if you plan on using it right away.
- Creating ad groups
The plugin also introduced the Groups feature to facilitate the management of several ads. To create a new group go to the plugin tab, select Groups, and click Add New. After naming your group, set the ads in the group according to your needs. With AdRotate you can personalize your ads to the maximum extent by choosing the places they will appear at, formats, and sizes that will fit best for the specific pages you select.
Affiliate programs
Well established affiliates can earn around $3,000/day which obviously attracts more and more people to the industry. If you’re one of those who is looking for a gold mine then the plugins we have here will serve you well.
ThirstyAffiliates
When you’re dealing with affiliate links on your website, a tool that will help you automate their creation becomes indispensable. ThirstyAffiliates not only helps you create affiliate links in your posts but also allows to easily manage them all.
Useful and safe redirect options, broad statistics, link shortening, and link fixers, categorizations and many more make your work with affiliate links convenient and fast.
Setup and functions
After you install the plugin its page appears on your WordPress account under Affiliate Links. This is where you’ll be managing the links for your affiliate programs.
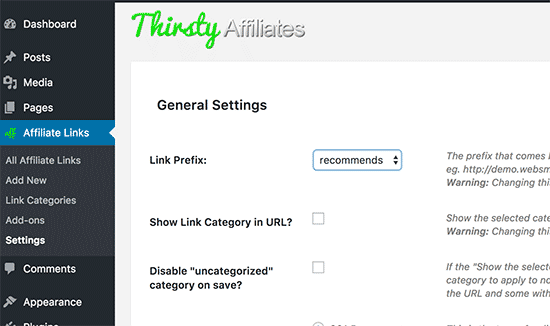
- The first thing you need to do is to create your affiliate link. Give it a name, set a destination URL, and provide a list of features that are important to you, like images, keywords, or categories.
- After that, your links will be available on your post editor, and their placement becomes as simple as choosing the relevant link from the list.
- To monitor the success of your placed links you’ll have to install a special add-on. As the result, you’ll be able to view links categories that are performing better and adjust your strategy accordingly. It’ll also allow you to export the statistics in XML for further use.
EasyAzon
For those participating in the Amazon Affiliate EazyAzon offers some handy tools aimed at maximizing the earnings and saving time. Instead of creating affiliate links using the Amazon site, you can stay in your WordPress account, and link to the affiliate products directly from there.
One of the features we found extremely useful is the Defaults tab which helps you set up the default configurations for your links.
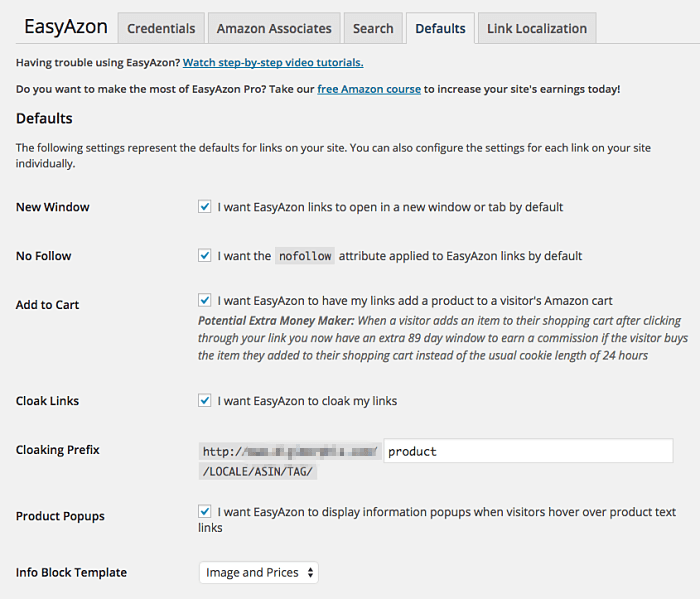
Whether you want the links to open in a new window, or you want them to be nofollow or show the detailed information about the product, this is the place to do it. And after you apply the changes they will become universal for all the links across your blog.
Setup and functions
EasyAzon is positioned as a time-saving tool, so the process of links creation is made to take as little time as possible.
- You start with creating the content for your blog.
- Then, when you need to make a link to an Amazon product, you click the EazyAzon tab.
- Use the keywords to find the necessary product, and choose the way the link will be displayed (text, image, CTA, or info block)
This is it. As you can see, this is muuuch easier than the traditional affiliate linking with Amazon Affiliates, when you need to get all the product links copied, then paste them on your blog, and struggle with progress monitoring on third-party sites.
We hope this list of WordPress plugins will facilitate your work and help maximize the earnings with your site and blog. In the comments below let us know whether you’ve tested any of them, and how was your experience.