GENERAL QUESTIONS (15)
Universal Plugin is applicable for the websites based on multiple types of engines (not only WordPress). In comparison to WP Plugin, the Universal Plugin allows you to choose the place and amount of the ads on a page of your website. To install the Universal plugin learn the Installation Guide.
Performance Rate influences the amount of sales you get from your sites. The higher your Performance Rate is, the more offers you get.
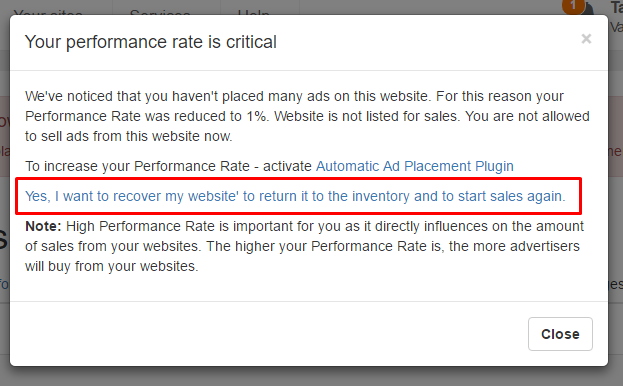
The Performance Rate of the site becomes lower automatically when you failed or rejected the ad placement, or haven’t placed many ads on the site. In this case the Performance Rate will be reduced to 1%. As result, the site pages will be blocked and unavailable for sales.
To keep the Performance Rate high you should not miss tasks for ads placement while using manual mode of ads placement. In order to be aware of the new tasks we recommend to set up email and sms notifications.
To increase your Performance Rate, you can activate one of the Automatic Ad Placement Plugin. Currently there are 2 automatic options available: WordPress Plugin and Universal Plugin.
If the Performance Rate of your site has reached 1% you may use the automatic recovery option. This option is only available for sites with 1% Performance Rate. To use this option click to the Performance Rate and accept the recovery process.
You may place the ads both on Google Adsense and MageNet. They are compatible and won’t come into conflict.
The functional process of MageNet is very familiar with Google Adsense, but they are not the same.
The warning message appears only in Auto Mode. It goes to show that you’ve failed the ad placement. This information is given to warn you, if the plugin doesn’t function correctly.
If you got this message, check the availability of your website pages. If you cannot find out the reason of the issue, contact us.
Please, consider that your site will be blocked and further sales will be suspended after 3 failed ad placements.
You can get the detailed information about your sites monetization process into your MageNet account:
- The detailed ads placement history
- The prices
- The current ads status
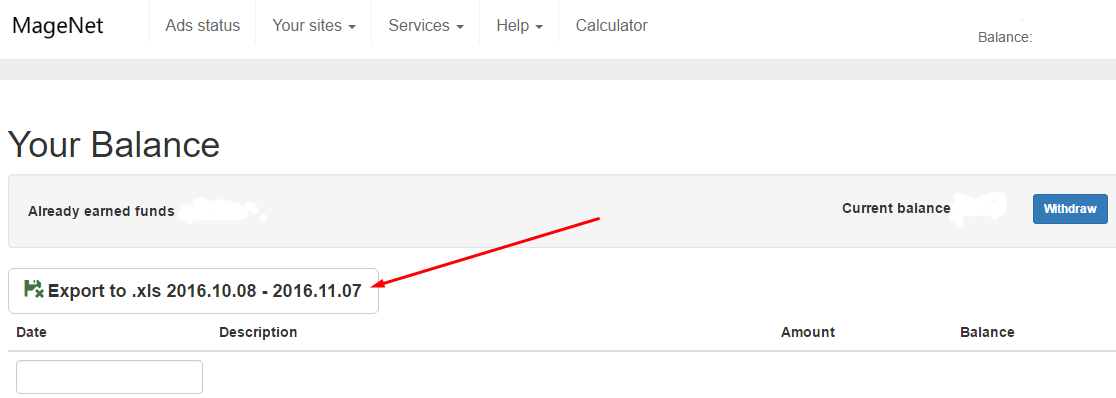
You can also get the detailed report about the incomes from your sites. To get the report, go to your Balance.
The Fee Pattern is a customized or default rule with fees that can be applied for one or several of your websites. Default fees cannot be changed. That is the minimal fee adjusted automatically according to SB Rank of the website and the number of outbound links. The higher the SB Rank is, the higher the fee is. Learn more about Default Fee here.
You can also set customized fees for your sites, click ‘Create Customized Fees Pattern’ button and follow this instruction.
NOTE: MageNet recommends using Default Fees to get a maximum number of ad sales from your sites.
Each user, who recommends MageNet to a friend, gets a 10% commission for every dollar the friend makes on MageNet. You can read more about the program here and join it when logged into your account.
- Go to your account and click ‘Referral Program’
- Accept the Terms of Use and join the Program
- Place the links
- Recommend MageNet to your friends by sharing your Unique Referral Link
- Get a 10% commission when your friends add their sites and start making money with MageNet
MageNet provides payments on NET-30 terms. It means that you will get paid within 30 days.
When your referral bonus is available for withdrawal, the money will be automatically directed to your MageNet balance.
WordPress Monetization Plugin that allows to:
– Confirm your website and start the monetization process.
– Save your time by placing the new ads on your website automatically
– Automatically change the ad if some corrections are required
– Automatically remove the ads which were canceled by a buyer
– Save you from errors which occur during manual ads placement
– Moreover, you can still establish the fees for the contextual ads by yourself, refuse to place some ads and forbid sales from certain pages.
Follow the instructions below to activate sales from your websites.
1. Login to your website’s WordPress Dashboard.
2. Go to Plugins > Installed Plugins or > Add New.
3. Search for “Website Monetization by MageNet” or install the plugin in .zip format via Upload option. Check the Version number. Is it the same as current version? If not, please update the plugin. Learn more
Make sure the plugin is installed and activated:
1.Login to your WordPress Dashboard.
2. Go to Plugins > Installed Plugins.
3. Look for “Website Monetization by MageNet.”
4. The plugin should be activated. If not, click Activate.
If you do not see “Website Monetization by MageNet” among your installed plugins:
- Go to Plugins > Add New.
- Search for “Website Monetization by MageNet” or install the plugin in .zip format via Upload option. Learn more
- Install and Activate the plugin.
Confirm your MageNet Key:
- Log in to your MageNet account.
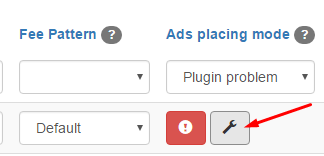
- Find the site marked by “Plug-in error” and press the “How to fix” button:
3. In the window that will appear you will see the MageNet confirmation Key. Copy it.
4. Go to your WordPress Dashboard.
5. Open Settings > Website Monetization by MageNet:
6. Paste the MageNet Key and click the Save button:

7. Click the Confirm button from your MageNet account:
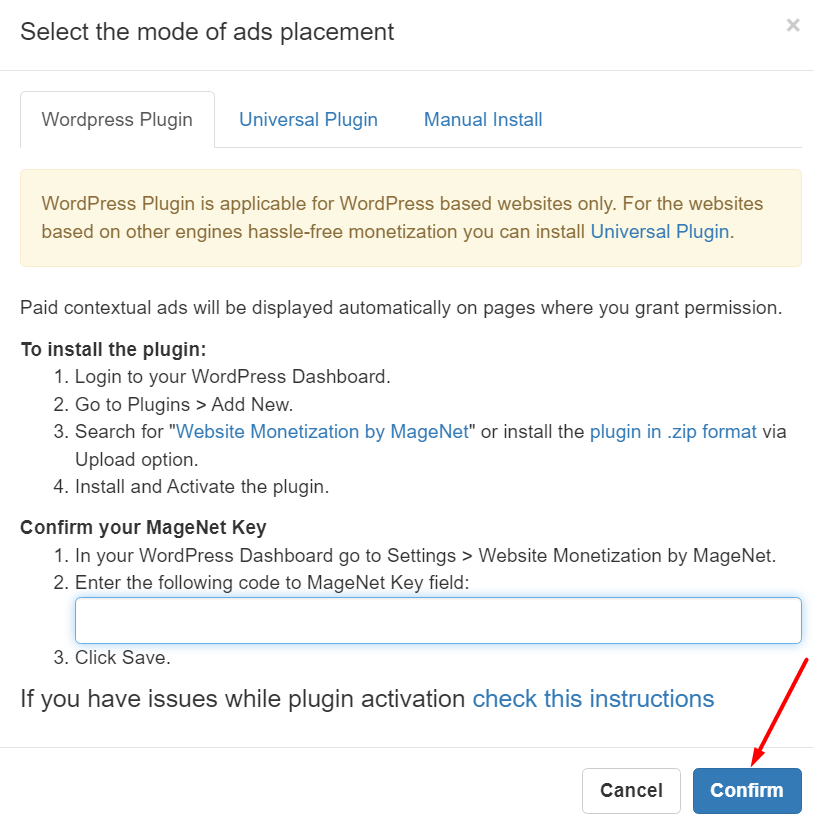 Make sure that “Plugin Error” message no longer appears in your MageNet account panel.
If you face any difficulties, please contact our support team and they will be glad to assist you with the plugin installation. Please, keep in mind that WordPress plugins support numerous ways of caching requests. To make sure that your users see the actual cached version of your web pages with our installed links, we recommend you to manually set the latest version of a web page to cache, and tell whether to cache it or not and for how long. The recommended timeframe for caching should not exceed 3 hours. Normally, this time is enough to process the latest changes on your website. Plus, the short caching time prevents your installed links from being unnoticed by your target customers and allows you to start raising money just after the links placement. If you have any issues concerning caching settings, please contact us so we can help you.
It will not affect your sites’ rankings / Google AdSense / traffic / sales / sign ups / effectiveness of your sites or anything else. Feel free to sell any other ads from your sites (including Google AdSense). Selling ads through MageNet does not violate Google AdSense policy or any other policies, rules or regulations online or offline.
You can submit any website into MageNet. However note that MageNet doesn’t allow the promotion of escort services, pornography, adult, or other mature content.
- Log in to your MageNet account.
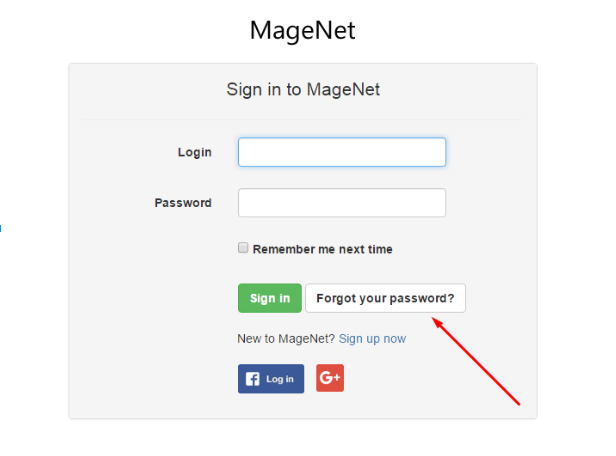
- Click “Forgot Your Password?”
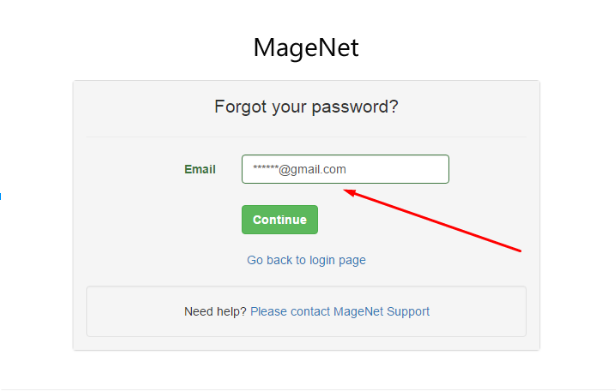
- Enter the e-mail address you used to sign in to your MageNet account and click “Continue”. Make sure that you have an access to the email address which you used for registration on MageNet and that you are checking the email which you inserted to the password recovery form.
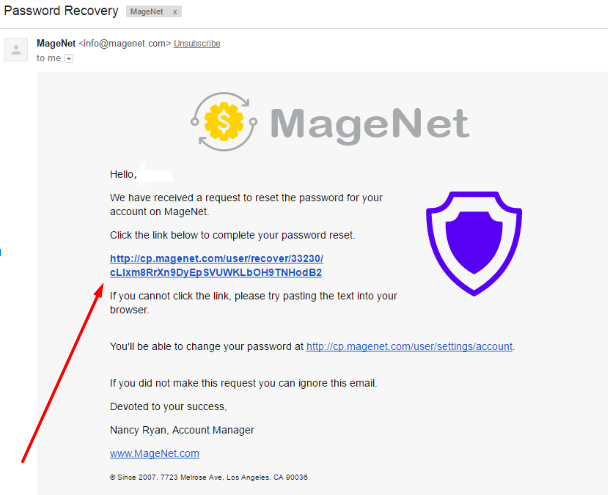
- You will receive an email with instructions for resetting your password. Open it and click the link to complete your password reset.
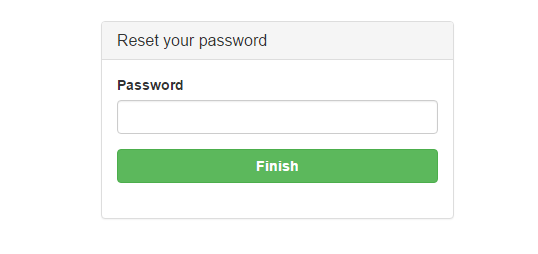
- To finish the process type a new password and click “Finish”
- Congratulations!
Now you can Sign in to your MageNet account with your new password.

At the moment you can sell up to 3 ads from a single webpage.
MageNet crawler will index your websites to find all pages and “know” all your content. It will “read” the content of your pages and determine its category. This information is absolutely private and stays ONLY with MageNet. MageNet needs to index the content of your sites in order to be able to offer relevant ads from your sites to our customers.
GETTING STARTED (10)
In website monetization process the category plays the major role. It has an impact on the number of the offers you get, hence on the amount of your earnings.
Pay attention to the category while adding the new website to your MageNet account. When the client is seeking the ad to buy, he chooses the certain category through our filters. If the website doesn’t match the required category, you won’t get the offer.
To know what categories are in-demand right now among the buyers, view this article.
If you haven’t found the corresponding category for your site, contact us.
Our service is totally free. You can monetize your site via MageNet with no charges. Place contextual ads for free and get money for that.
If your website is based on the Blog Platform and you haven’t got the access to the root directory of your website, then use this method to activate your website:
- Log in to your account.
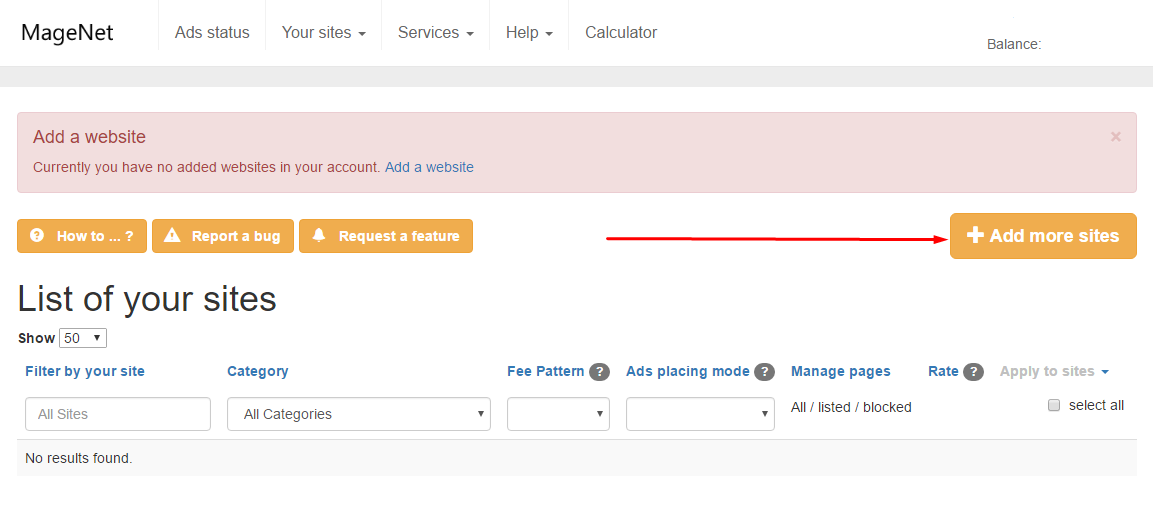
- Add all your websites by clicking “+ Add more sites”:
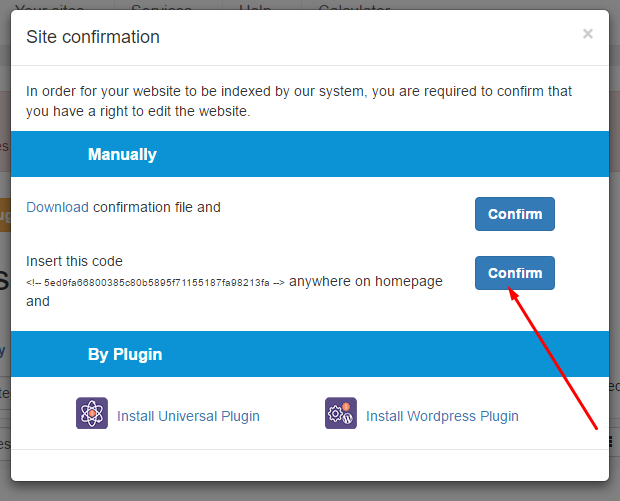
- Our system will generate your personal code. It will look like this:

- Copy the code and insert it anywhere on your website homepage.
- Click “Confirm”:
Note: The website created on blog platform can be monetized only in manual mode.
If you want to set up your fee for placing the ads on your website, you should create a new Fee Pattern. Follow the instruction below:
- Log in to your account.
- Go to Fee Pattern interface.
- Click “Create Customized Fees Pattern”.

- Name the new Fee Pattern.

- Set up a fee for a homepage of your website. Selected percentage of increase will be applied for homepages of your sites, for which this Pattern Rule is applied. Note that 0% means the initial fee for your homepage. For example, if you select 50% increase and SB Rank of your homepage is SB4, and your selected fee for SB4 is $2, then the fee for your SB4 homepage will be $3 (increased by 50% from $2).

- Enter the fee in the Custom Fee column for every SB Rank. The higher the Rank is, the higher the fee is per ad.
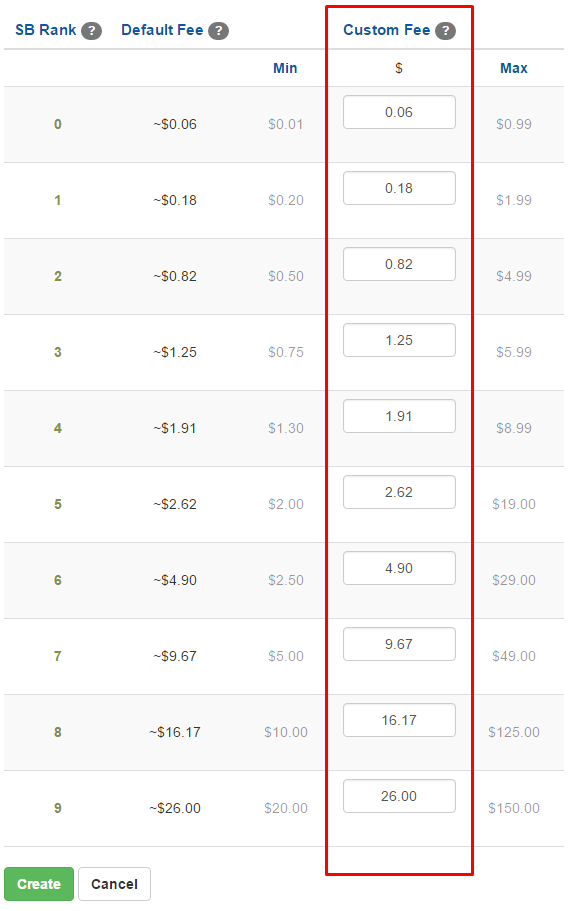
- Click “Create” button in the bottom of the page.
- Use “Manage selected sites” option to apply the Fee Pattern for your websites.

- Make a list of the sites and click “Save”.
You can edit the already created Pattern anytime. Just select the Pattern and click “Edit” button. 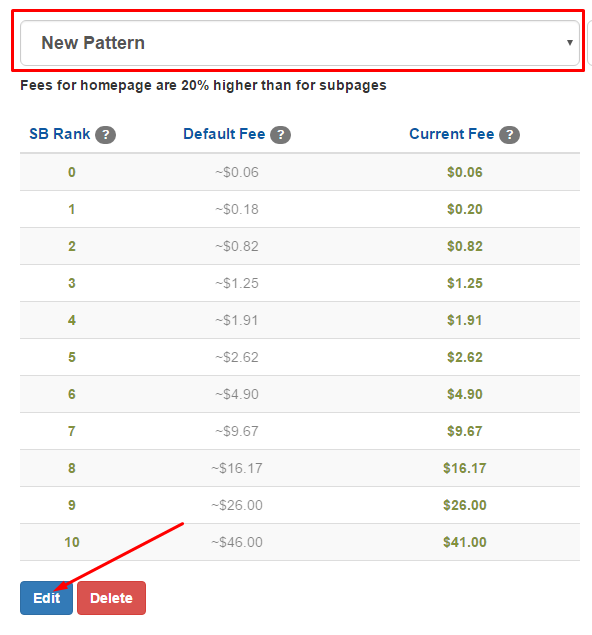
We recommend putting the reasonable prices as too high or too low fee can lead to decreasing in sales. You will win even more offers if you use the Default Fee Pattern.
Note: the fee will be changed only for upcoming contextual ads. The fee for already placed ads will remain the same.
You can set up SMS notifications to know about new ad offers, payments or critical errors in the convenient time.
To setup SMS notifications:
1. Go to Your Account Settings
2. Find the ‘Phone’ line

3. Press ‘Edit’ and provide your mobile-phone number in a format +123456789000.

4. Click ‘Confirm’ button.
5. Enter the verification code which you received via SMS and click ‘Save Changes’

6. Click on the ‘Notifications’ tab and choose notifications which you want to receive via SMS. Then click ‘Save’ button.
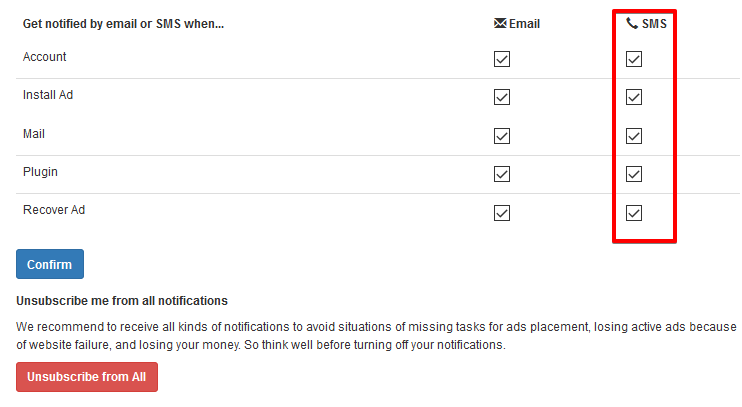
Congratulations, now you will get SMS Notifications!
- Fill out this web form.
- Add the sites from which you want to sell contextual ads.
- You will receive an email with your login & password details by email.
- MageNet will start to index your confirmed websites and send you placement offers from our advertisers.
If you can’t find the notification with your email confirmation link in your inbox, please be advised to check up your spam or junk box, since it could get there.
If the notification is not found even after your spam folder check, then you should log into your MageNet account, come into your account “Inbox”, find the window with the text “Please Confirm Your Email” and click the link in this window. Then you should renew the tab with your open email and find the notification.
Log in to your MageNet account, come into Your sites menu and click “Add more sites” button.
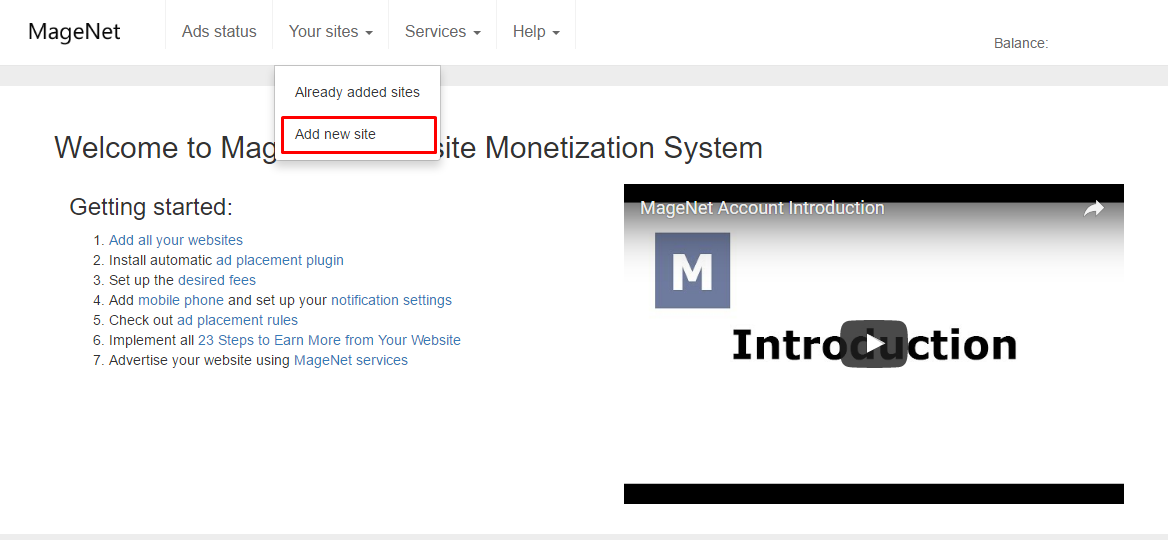
Then add the URL of your new site, select relevant category, and press “Add” button. After that you will be offered to activated plugin for automatic ads placement.
Once MageNet crawls and list for sales the pages of your websites, it will start to sell contextual ads from them and send you offers. The list of them you can see at “Page options” section at “Your sites” interface of your account. It is not possible to predict when you receive the first ad sale; it can be from 1 day to whatever. Most of our publishers start to get their first sales within a week after registration. If you don’t get any sales, this could be because of one of the following reasons:
- There is no or too little number of pages on your sites.
- There is too little content on your sites.
- There are some availability issues with your site (server errors, domain name issues etc.)
- The category of the site is chosen wrongly.
- Bad looking design.
When you have already added a new website to MageNet.com, it needs to be activated. The website will not be indexed until the site is activated.
To activate your website and use manual mode of ads placement in future, please follow the next steps:
1. Go to ‘Your Sites’ interface and find the website which is required to activate.
2. Press ‘Confirm the site’ button, which you can find at the ‘Status’ column.
3. Press ‘Download confirmation file’ button.
4. Put the downloaded file into the root directory of you site using your file manager (a program which transfers the files to the server) and click ‘Confirm’ button. The placed file has to be only in .txt format. If you do not know how to put file to the root directory, learn this article.
5. After the given file is placed successfully, your website becomes ‘Activated’.
6. The indexation process usually takes 1-2 days. This period varies depending on the number of pages on your website.
7. When you see listed pages at ‘Your Sites’ interface, it means that you already can sell ads from those pages.
You can see more detailed information about certain pages at ‘Page Options’ interface
After you activate the ads sale, the ‘Manual Mode of Ads Placement’ will be activated by default. It means that when somebody purchases the ads on your page, you will get a notification and will be required to install the ads manually by placing the provided HTML code to your page. So as soon as you activate your website, we will index your pages within 48 hours, and MageNet will determine the pages for ads sale (listed pages), then we will start selling ads from your site to our customers, so you can expect tasks to install the ads.
If do not have access to the root directory of your website, you can confirm your website by inserting the confirmation code anywhere on the homepage of your website.
Here you can find the information on how to activate WordPress Monetization Plugin and the Universal Plugin on your website to set up automatic mode of ads placement.
When you have already added a new website to MageNet, it has ‘Manual Mode of Ads Placement’ by default. To change the mode of ads placement to automatic, please follow the next steps:
- Check the box in front of the needed website
- Click the button ‘Change to automatic’ in the footer side of ‘Your Sites’ interface
- You’ll see the information about your ads status after changing the mode of ads installation. Also this step requires you to install WordPress Monetization Plugin or Universal Plugin at your website.
- After the Plugin was installed correctly, your website became Active and you can sell ads from this site.
Note: If you have an automatic mode of ads installation, all your ads will be placed automatically, skipping your tasks.
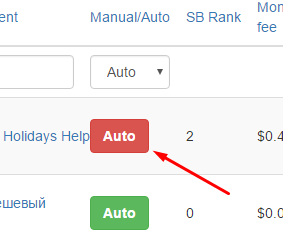
If our system can’t find the Plugin at least at one of your pages during checking, your website will have Plugin error. In this case click ‘Plugin Error’ button and follow the steps, required to fix the issue.
To transfer your website from automatic mode of ads installation to manual, follow the steps, described below:
- Check the box in front of the needed website
- Click the button ‘Change to manual’ in the footer side of ‘Your Sites’ interface
- Now your website has ‘Manual mode of ads installation’. Your site doesn’t need a confirmation in this case. The indexation process usually takes 1-2 days.
Note: All your ads, which were placed automatically will move to ‘Your Tasks’ interface with ‘Waiting for recovery’ status. You have to place them manually, during 5 days.
PAYMENT & WITHDRAWAL (8)
The following commissions apply when you make a withdrawal request:
PayPal
The 4% commission applies to the publishers who’ve made a withdrawal request via PayPal.
USDT
The 5.45% commission applies to the publishers who’ve made a withdrawal request to USDT address.
The money will be added to your balance on the 31st day after the article was placed in case if it wasn’t removed.
Use https://tronscan.org/, enter your wallet ID in the “search” field and press Enter. There you’ll see all received transactions.
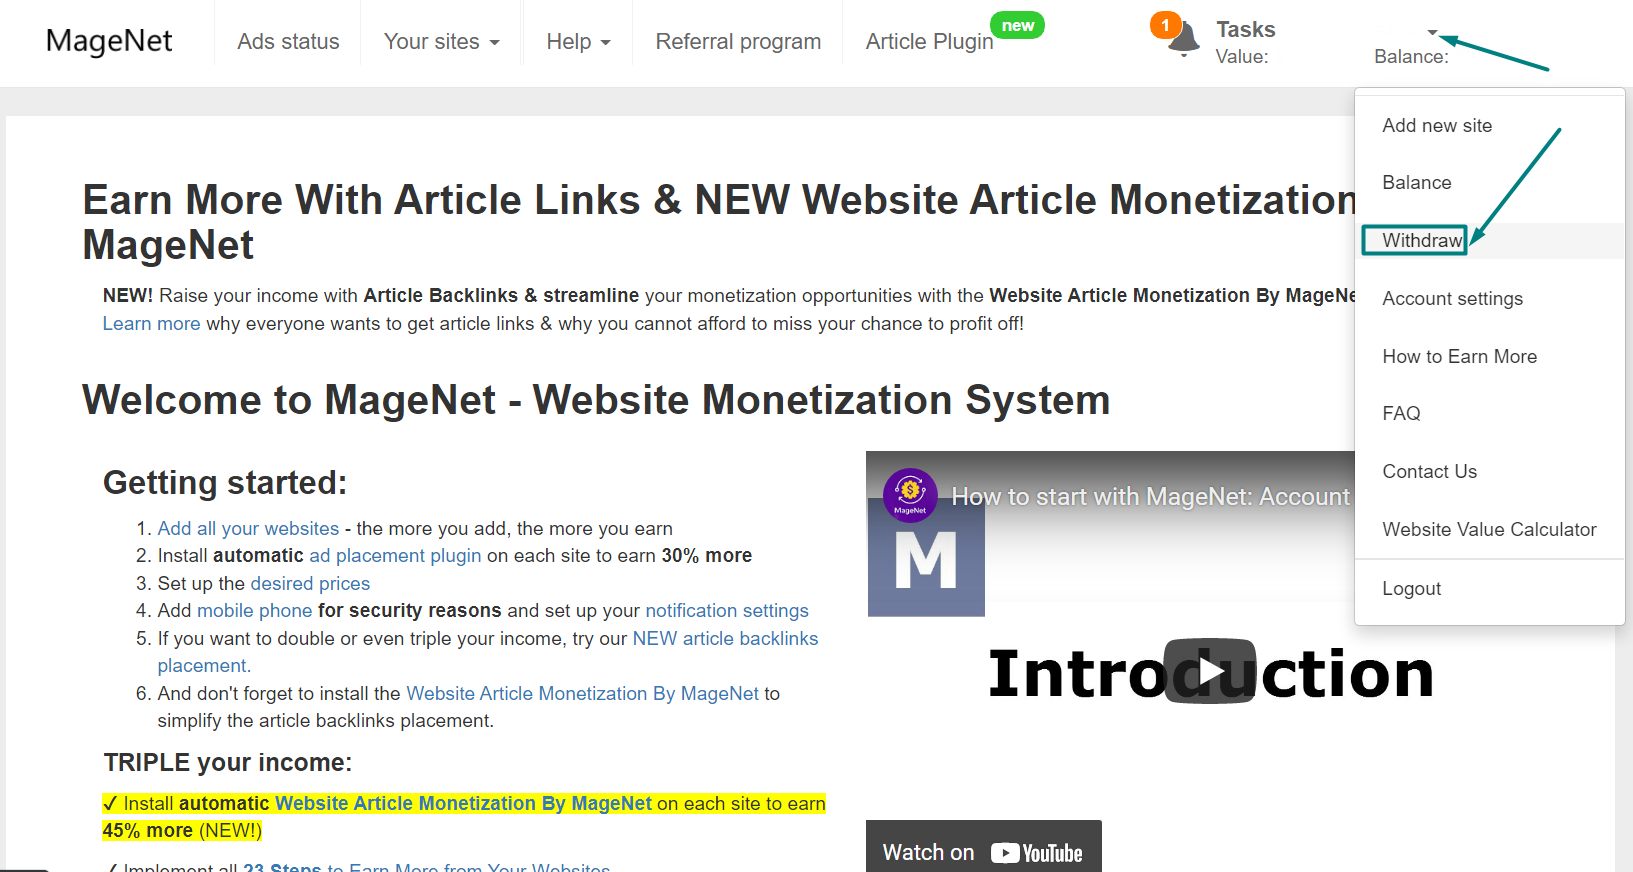
1. Log in into your MageNet account
2. Click on the drop-down menu over your balance
3. Choose “Withdraw” section
Note: the minimum withdrawal amount is $60.00
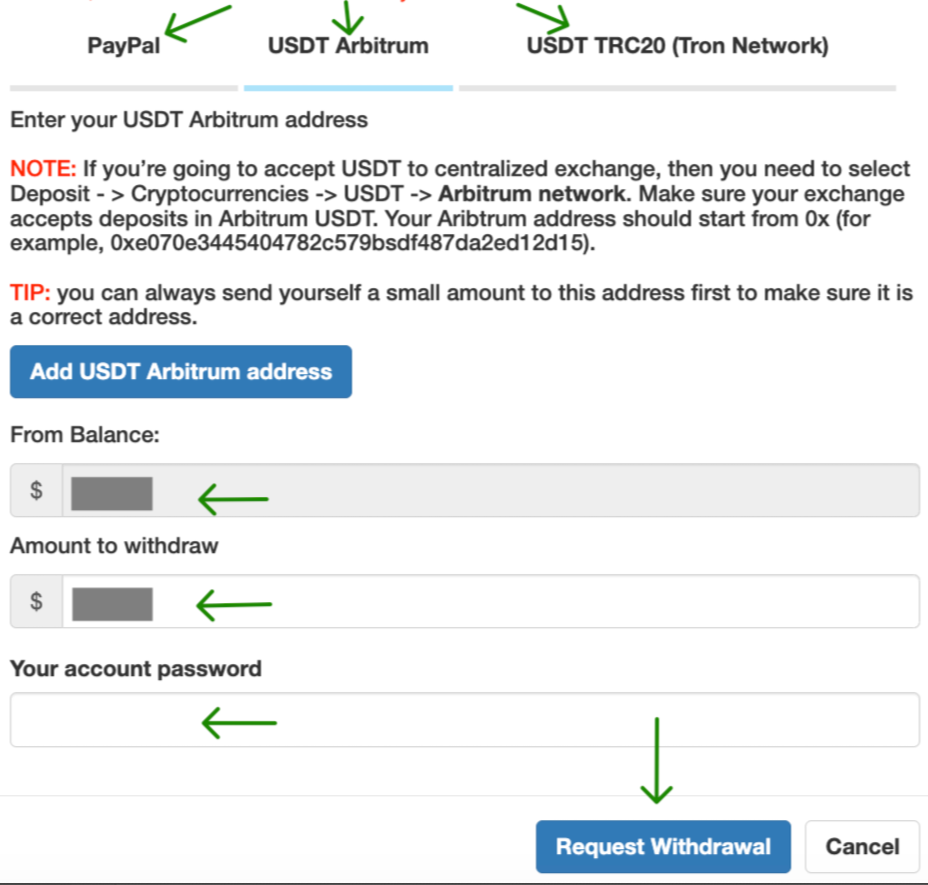
4. Select the Payment Method
5. Fill out this form and click “Request Withdrawal”.
It is NOT recommended withdrawing your funds to an exchange because you do not have a control over your seed phrase there, and so the funds. Exchange can become bankrupt, hacked or can lock your funds because of any reason and require you to complete KYC procedure. So better download Tron (https://tron.network/wallet) or any other secured wallet and securely store your seed phrase. NEVER share your seed phrase with anyone. Our support will never ask for a seed phrase. Only scammers can do that, so never share it.
Transfers are made on a monthly basis via PayPal, USDT TRC20 (Tron Network), and USDT Arbitrum.
Payments are made once a month from the 1st to the 7th day of the current month for the past month. So make sure to request your payment before the 30th day of the ending month. If you request it later, it may be sent to you in the next cycle.
The money will be added to your balance on the 31st day after the ad was placed in case if ad wasn’t removed. We are interested in long-term relationships with our clients and stimulate them to prolong the ads but we still give them a right to cancel ad in case if they didn’t like the ad during the first 30 days.
Currently, we can transfer your MageNet balance only via PayPal, USDT TRC20 (Tron Network), and USDT Arbitrum. But if you absolutely cannot withdraw your funds using these payment systems, let us know what payment method you prefer. Vote for other ways to request withdrawal right here.
There must be at least $60 on your MageNet balance for you to be able to process the withdrawal.
AD PLACEMENT (13)
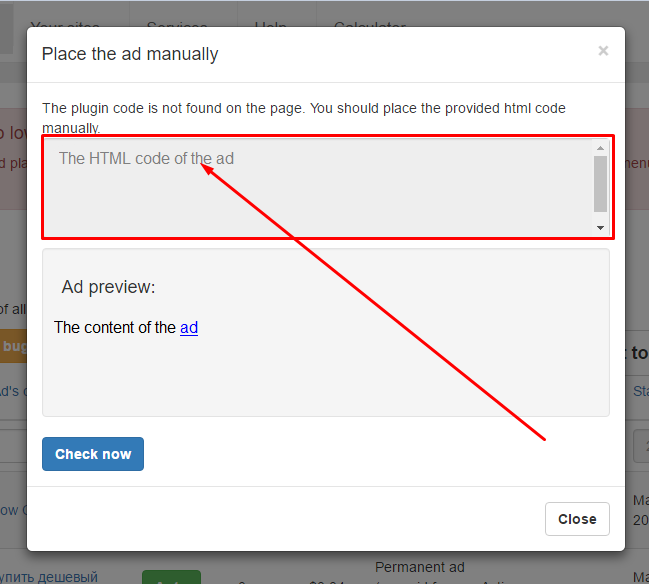
To place the ad on your website follow the next steps:
- Go to the Tasks Section.
- Copy the HTML code generated by MageNet.
- Put it into the HTML document of your website with no changes.
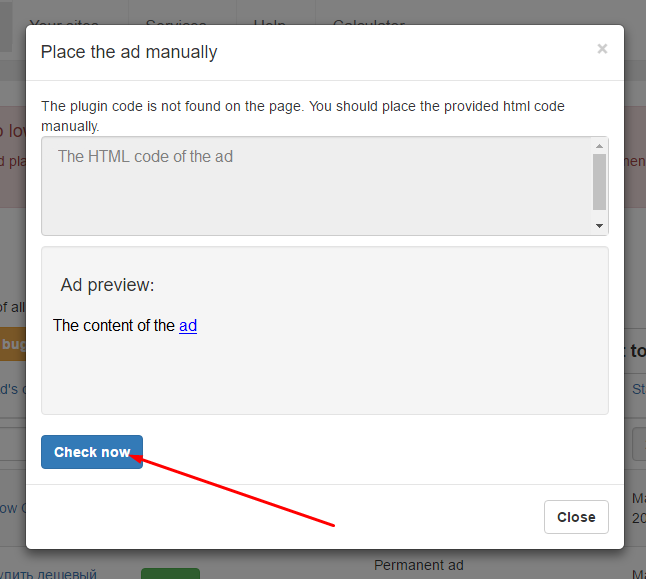
- Go to your Task Section and press ‘Check now’ button
Note: Don’t edit this code. To be supplied by MageNet system it should be placed precisely as initially generated. If the ad is not detected by our system, it means that the HTML-code has been placed not correctly

If you have a lot of websites in your MageNet account, but you do not want to spend much time placing every ad manually. We have a solution for you. You can install one of MageNet Monetizing Plugins on your website and don’t put yourself to ads installation/removing bother.
There are 2 automatic options available:
 WordPress Plugin, applicable for WordPress websites only. How to activate it read here.
 Universal Plugin, applicable for the websites based on multiple types of engines (not only WordPress). Universal Plugin allows to choose the location and amount of the ads to be placed on webpage, unlike WordPress Plugin. How to install the Universal plugin browse the Universal Plugin Installation Guide.
Plus you may also increase your Performance Rate by activating one of the Automatic Ad Placement Plugins. The higher your Performance Rate is, the more offers and income you get.
Our customers have 5 days to prolong their ads. If the ad wasn’t prolonged during this period of time, the ad becomes ‘Cancelled by advertiser’. You won’t be paid for this period of time. We give this period to customers for them to have enough time to pay for ads prolongation.
This is likely because the text ad is in a foreign language that your web page does not know how to display correctly. This is caused by the character encoding settings on your site. Probably you will need to change the supported character set from (Western) ISO to UTF-8. Your web hosting provider or website designer can help further with how to make such a change. Alternatively, you can just deny installing this ad.
If you want the system to accept such an ad, then:
- Make sure it will be displayed on your website correctly
- If the ad is displayed correctly but isn’t accepted by the system, then it may happen due to diacritic symbols.
Some websites experience the issue when the WordPress Monetization plugin creates the same ad in every post on one page.
In order to fix the issue please:
- Update your WordPress Monetization plugin to version 1.0.10 or above
- Check the box ‘I have “WordPress SEO” plugin by Yoast activated on my website’.
This will fix the conflict between our plugin and plugin from Yoast.
“Site-wide placement is not acceptable” error appears when placed ad is detected not only at required page of your site (specified in your Tasks) but also on other internal pages.
To fix this issue please make sure to place the ad in content (article) that will not be duplicated on any other page of your website.
If you do not follow any of the following rules, MageNet may stop to sell contextual ads from your sites and/or cancel already sold ads without paying for them.
1. Place sold ads within the content of your pages and surround them with relevant content. It is strongly recommended that you place sold contextual ads within the content of your webpage because in this case advertisers prolong such ads 3 times longer than ads, placed in the footer or in the sidebar. 
So if you place ads within the content of your page, you will earn 3 times more.
If you do not have any content directly related to the advertiser’s website, create it. Ad surrounded by text, related to the site topic looks more natural to readers and our clients, purchasing ads from you.
2. The required contextual ad should only be visible at requested page and nowhere else on your website (site-wide placement is not allowed).
3. You must place sold ads on your sites within 5 days. Once someone buys an ad from you, MageNet will send you an email, requesting you to place a purchased ad on your webpage. If you successfully place the ad, click ‘Check’ button, and MageNet finds it on your site, this deal will be considered as active and you’ll receive your first payment for it in 30 days. If you do NOT place the ad on your site within 5 days, the deal will be canceled.
In this case, MageNet stops selling new ads from all of your sites until you take some steps to resume ad sales. When the sold ad is not placed, your MageNet publisher rating will be automatically lowered so you’ll receive fewer ad sales in the future. This was done in order to motivate you either to place all sold ads on your websites or to limit your sales to certain pages in your sales settings or to set your own prices so that you don’t get uncontrolled ad sales, which you don’t want.
4. All contextual ads must be static. All sold ads must always stay on those pages, where they were purchased. It means, that if you want to place an ad on the homepage of your blog, then you must place it so that it won’t be moved to the second page later along with the content, which goes to archives. If the ad was sold from the homepage of your blog, you should NOT place it within the blogpost, which is shown on your homepage now, but which will be moved to the archives later. You must place the ad either within the sticky blogpost, which won’t be moved to the archives later, or somewhere else on your homepage. Sold ad should be placed & always stay on that page, from which it was sold.
5. All ads should be easily found. Attempts to hide or conceal the ad’s text on your web page(s) will result in your account being canceled.
6. Do not mark ads as paid, sponsored, affiliate, or similar. Many ad sellers openly advertise the fact their paid ads are sponsored in one way or another. We recommend not to demonstrate that ad is sponsored, to maintain the nativity of the ad. That goes for ad anywhere on your site, be it the sidebar, or in the middle of your content.
7. In case of a strong violation of the rules, the penalties can be implemented. MageNet reserves the right to hold back the requested funds withdraw until the violations are eliminated.
8. If you don’t want the certain ad to be placed on your website, you can refuse it.
In manual placement mode you have 3 business days to place the ad on your website.
If your website has an automatic ads installation mode, make sure that you have activated WordPress Monetization Plugin by MageNet on your site. If you have already installed the plugin, then make sure that it has ‘Activated’ status in ‘Your Sites’ interface.
If the plugin is activated correctly, but the ad wasn’t found by MageNet, it may happen because your ad moved from one page to another. It usually happens if you have a blog. You can place the contextual ad on the front page, but when you add several posts then the ad get moved to the second page and our system doesn’t see the required code on the front-page anymore.
If you have a manual mode of ads installation at your website, make sure that the webpage where you see the ad corresponds to the one which is shown in your “Tasks”. You can see the exact reason of ad cancellation above the ‘Check Now’ button. Then check the html code of your ad. It should be the same as the one in “Tasks”. If your blog has an option “stick the post on the front page” then you can easily fix this.
Yes, the ad should be placed only in content.
After the ad was placed at the needed page, click ‘Check Now’ button at ‘Your Tasks’ interface. If the ad was placed correctly, it will move to ‘Your Ads’ with ‘Active’ status.
Log in to your MageNet account and visit Ads status menu.
SITE MANAGEMENT (9)
If the site pages become “Blocked” in MageNet system that means that they are not available for sales anymore and the ads placed on them are to be renewed.
Use this checklist to ensure that the site is in compliance with an index once again:
1. Performance rate is too low.
Learn what is Performance Rate and how to handle it here.
2. The site is not available on the Internet. Server is down.
Always care your website availability.
3. Domain name has expired.
You should think in advance about your domain expiration time. Renew the domain name immediately if it is expired. Otherwise you can loose the active links and new offers. Learn here how to create the new domain.
4. Search Engines penalties.
If you suddenly get notified by search engines that your website may get a penalty, then learn how to identify search engine penalties.
As far as Google PageRank is outdated, we have developed our own metric – SB Rank based on site’s DA and PA. It is calculated by the formula: (PA×0.6+DA×0.6)/10 – for sites not included in Alexa Top 100 rankings. In such instance, SB Rank equals only page authority metric. Learn the benefits of SB Rank here.
You can have the full control on the contextual ads sales process. You can get all necessary information about your sites monetizing processes: the amount of placed ads, when and where they have been placed. All the details are into Ads Status interface:
You can also download the full report about your ads using this feature:
Some of my pages have “Not listed” status. What does that mean and how do I make them “listed”?
“Not listed” status means that currently this page is not available for ad placement for you have manually forbidden ad placement for this page in “Pages options” menu. To make the page available for sales again tick the page and apply “List” option.
It means that someone else has already added your site into the system. Please, be noticed that as that person has proved his site ownership, he can make the certain changes in your source code. Thus, you should make sure that your webmaster or any other person is not the client of MageNet. Anyway, contact us to resolve it.
The indexation process usually takes 2 days.
Log in to your MageNet account, come into the Your sites menu and click on “Remove” button in from on the site which should be removed.
To stop the sales from your sites you should remove all your sites from the list of Your sites.
It is highly recommended to forbid sales on the pages where you don’t want or simply cannot place contextual ads. This will help you to keep your MageNet publisher rating high for the given website and accordingly your website will be more popular among our customers.
How to forbid sales from certain pages of your website:
- Go to Your sites menu and click “Pages options” button in front of desired website.
- Find the page you would like to forbid sales from and switch “Listing options” switcher from ON to OFF position.
Note: you can forbid sales from certain pages only after MageNet indexes and finds your website pages.

